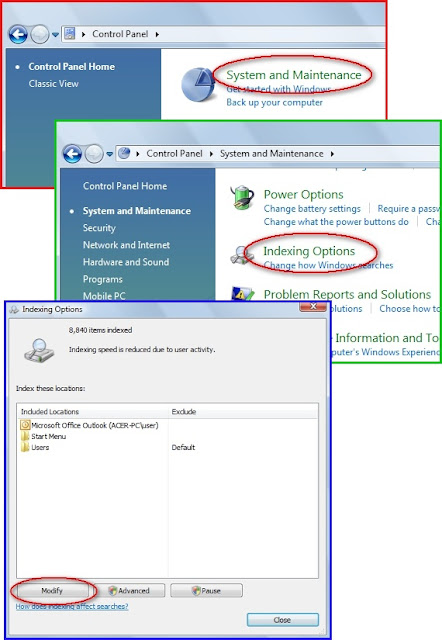
By using a search index, Windows can help perform a search for certain files quickly. But by default, not all of the folders in your harddisk are included in the indexed location list. Windows Vista allows you to add or remove a folder into/from the indexed locations list.
To add or remove a folder in Windows Search index:
- Open Control Panel. (Click Start menu, and then click Control Panel).
- In Control Panel, click System and Maintenance, and then click Indexing Options.
- In the Indexing Options dialog box, click the Modify button. Then the Indexed Locations dialog box appears.
- To add certain folder, under Change selected locations, select drives or folders that you want to include in the indexed locations. The drive/folder you select will be displayed in the list under Summary of selected locations.
- To remove folders/drives from the indexed locations, under Summary of selected locations, click the folder you want to remove, and then under Change selected locations, clear the pointed check box.
- Click OK button. Then click Close button in the Indexing Options dialog box.


No comments:
Post a Comment